
Passion for baking
Without food we cannot go on living. Without great cooks we don’t know the difference between what’s mouth-watering from just plain edible food. We can be motivated to eat by just the presentation, smell and taste. A happy tummy means you have a satisfied smile over a plate of good food. And that is what I want when I prepare food. I like to bring great delight in every bite. I want to prepare cakes and sweet giveaways that would satisfy the celebrant and guests. My wish is that I can take part in celebration of one’s milestone or special occasion like birthdays, dedication or christening, graduations, etc. or simply make a wonderful surprise with a sweet treat.
So how did I get into baking when all I wanted ever since I was a kid was to have my stomach filled with food when I get hungry and have my dessert afterwards? It all started when I was young who had a mother who loved to cook and baked with “a little dash of love.”I used to watch my mother prepare the food on the table. I observed how she diligently looked for the fresh and crisp vegetables, smelled and touched the meat and looked at the gills of the fish to make sure they were red and firm. My recollection of her cooking always brought happy thoughts of a satisfied stomach. With all my eagerness to learn, my mother was helpful enough to teach me what to prepare and shared her step-by-step instructions of a “wannabe chef.” She even prepared recipes that were handwritten that served as memento that I still use up to now (sort of like a family recipe to me).
One thing that I would never forget was her passion for cooking. She said that “cooking is about your expression of love to someone.” She always had an empty pepper shaker where she would religiously use before serving a dish or after baking a sweet treat. It was a symbol of “adding a dash of love” which remained imbedded in my heart.
I heard her story that she was an ugly duckling who turned into a beautiful swan when it came to cooking. People used to comment about what was lacking or overly done with the taste and sight of her “disastrous” dishes. It served as a challenge for her. She made up her mind that she could be a good cook. She enrolled in short courses in home economics, learned tips from the experts, asked her friends how to cook a certain dish and get the recipe that she liked so that she could try it at home. With so many trials and errors and her great dedication to serve good food, she made her cooking right and got ripe for compliments. From that time on, I heard people talked about how good she was and how satisfied they were with the food she prepared. From a simple afritada to complicated cassava cake with custard sauce and macapuno toppings. Everything was prepared from scratch. No ready mix for her. Then she was able to concoct her own desserts. She had her own coconut surprise balls and chocolate-dipped bread sticks to wow the kids in our neighborhood. Parties at home would never be the same again. Our guests had their own share of the take-out of the leftover food with their own tupperware containers or desserts wrapped in aluminum foil or placed in bottles.
My mother really served as an inspiration to me. She was really a great inspiration to me. I liked the way she taught me. She allowed me to watch her intently the way she cooked vegetables, prepared the pasta sauce, different ways to slice the meat, how hot the oven, taught me the terminologies that seemed to overwhelmed me during our cooking sessions. When the dish was served, she would let me smell the aroma of the food and tried to figure out the taste (just like in the movie, “Ratatouille”). She showed me how it was done and when it was my turn to cook, commented on whether I was doing it right or I was putting too little or too much of the condiments or I was under or over cooking a particular ingredient.
That was how I learned to cook and bake. And here are some tips that
could serve as a guide to anyone who wants to start cooking or baking:
1. Try to cook your favorite dish or bake the cake that you’ve always wanted
Starting with your favorite cake will get you motivated. The first dish that I learned to cook was adobo because I really loved it. I guess you are not a Filipino if you don’t eat this. So I kept cooking the dish again and again until I made it right. I asked for the opinion of my siblings until they told me it was delicious enough that they were asking for more.
2. Get two to three recipes of a certain dish or pastry
It is good to look for different recipes of the same food so that you can see the type of ingredients and their measurements. Adding an egg can change the taste of your cake. Using butter is different from oil. You will be able to distinguish the taste, texture, smell, appearance etc. until you are satisfied with the outcome of your home goodness. You can do some variations too and make the recipe your own and it can become a “trade secret” or “family recipe” that you can pass on to your children just like what my mom did to me.
3. Be educated
When interested to cook or bake? Enroll in school and make a career out of it. You can also take short-courses handled by Heny Sison, Dorothy Fereira, Chef Gonzales or Chef Boy, etc. Watch TV channels that showcase the talents of chefs all across the globe from any country or cuisine that you like. You can even have your self-study through YouTube. Nowadays, there are a lot of online courses for free or for minimal fee you can have an access to their video tutorials. Ask a recipe from a friend and tell him/her to show you how it is made. Go to forums to learn more about the comments and suggestions of great chefs and bakers. You can even post your questions and who knows someone might give an answer to your query.
Do your own research and learn more about the world of food, cooking, baking and every kind of ingredient that you can think of and dare to explore something new or a different kind of taste of fusion of different dishes. Sky is the limit. No one can stop you from learning even from scratch. I always wanted to learn how to create cake designs but I did not know how. So I asked my friend to let me know how to make fondant (sweet dough that you can mold with your hands and hardens enough as it dries). I also enrolled in a baking school to enhance what I know about fondant making.
The hindrance that I can think of why you may not be able to do it? The answer could be lack of time and confidence. If you make a way andset aside a particular time to do it and make it happen. If you want it, you can have it if you will it. Tell yourself, ” I need to do it because I want it.”
4. Be ready to get cut, sliced, burned or frustrated
Don’t be afraid to be cut, sliced or burned. This is but normal. But as you are careful with how you prepare the food and handle the ingredients, you can minimize the damage and protect your body from any harm. Remember that you are dealing with sharp knives and hot stove or oven. No matter how careful you are, accidents do happenIf you are frustrated that you did not get it right the first time you did it that’s okay. Right practice makes it perfect.
5. Never stop cooking or baking
When my mother died, my wanting to cook also went with her. It took awhile until such time I was reminded of the very reason why I need to cook more than just feed my family. I know it was my love for my family that resurrected my desire to bake again. It was a simple wish from my sister to bake her cream puffs that made me got on my feet and open the door of my ever reliable my portable electric oven of 20 years! As they say, the rest is history and now I am back to baking and learning new recipes to wow my family, friends and clients of my home-cooked goodness and baked creations.
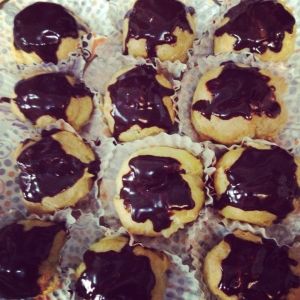
cream puffs: first ever pastries I learned to bake
6. Turn your hobby into business
With all the compliments that my mother got from the people around her, it motivated her to turn it into a business. Her hobby became a lucrative source of income. From our home, we got a lot of orders of her merienda treats like cassava cake, ube jam, or doughnuts, etc. Then finally, she had the courage to open her own small bakery. She hired a baker to teach her the basics of bread making until she employed workers to help her with the operation of her bread and pastry business. She was able to turn her dream into reality.
I think there will always be an entrepreneurial spirit in any of us. All we need to do is find what we want to have, study the market, create a dish/pastry/cake that’s highly saleable in the market and voila! You have your own story to share of your humble beginnings. Who knows your recipe and your restaurant or bakeshop will be sought after. People will always be reminded of how well you served the food, the way you presented their plate of good food and how you have tickled their appetite and kept them coming back for more orders.
Or if you’re still unsure of putting up your own “large-scale” business venture, you may opt to try to get orders from relatives, friends, officemates and classmates. Do samplings or taste-test of your dish or baked goodies. You can join bazaar or do online business by having your own Facebook page or join groups or communities where you can sell your product. As long as you have time to do it, you can start anytime.
So what are you waiting for? Get a recipe, learn to cook and start a hobby and maybe even go on a business venture. You will never know if you are a great cook or a talented baker if you don’t do it. Be the chef that you’ve always want to be. By God’s grace you will know if you are cut out for cooking or baking if you are surrounded with people who were carrying satisfied smile, full stomach and with empty plates of the food and dessert that you served.
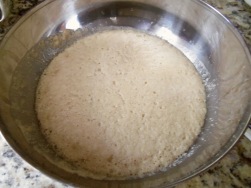
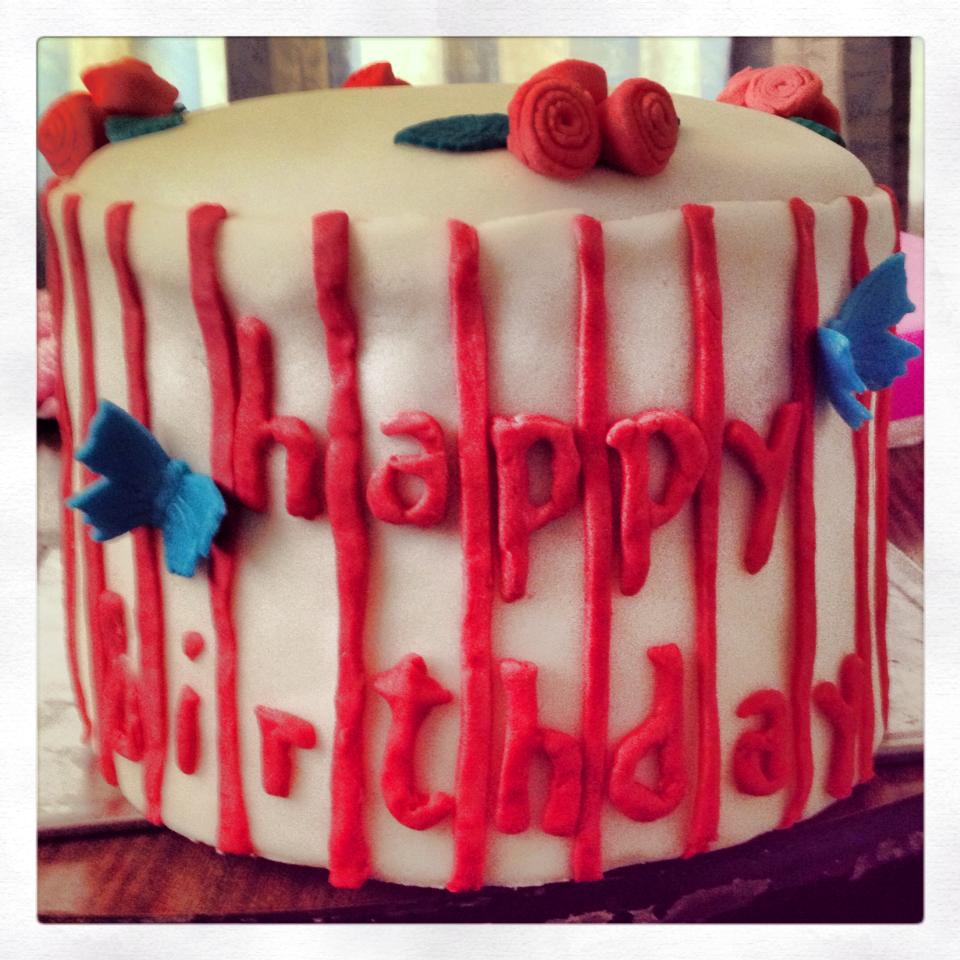
Here are some baked creations that I made for my friends! You can also do these and you may be a better baker than me. I hope I served as an inspiration to you. Remember, always add a little dash of love when you cook or bake. It will surely make a whole lot of difference when you do it with love!

booties cupcakes

floral birthday cake


